
Lets have a go at getting an Apache2 web server, “myweb.fortaspen.com”, running HTTPS secured using certificates from our very own certificate authority. The certificate authority will have a master certificate and an intermediate certificate (signed by the master).
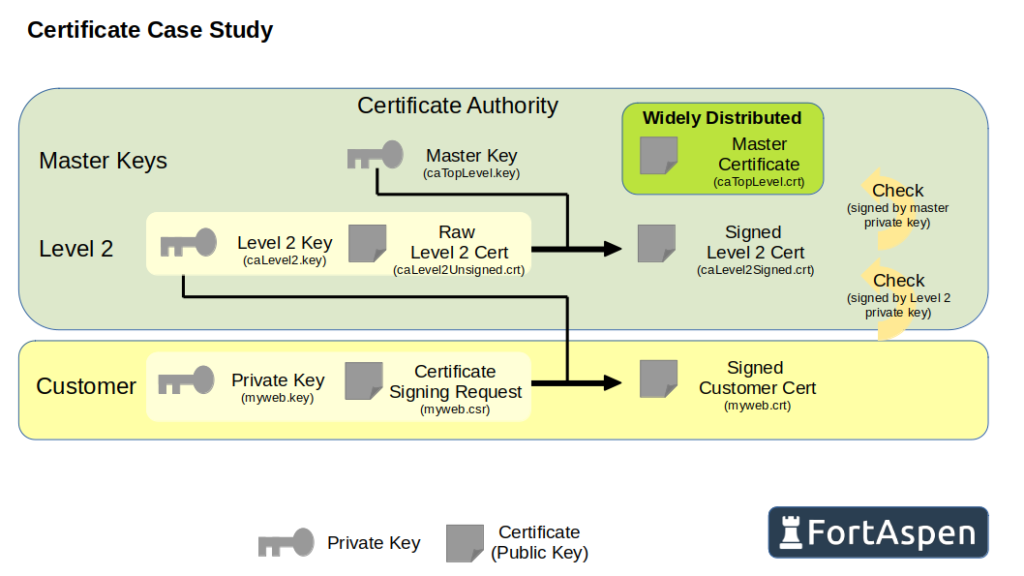
CA Master Certificate
The first step is to create a certificate authority private key. The whole system is worthless if this is compromised so we’ll give it a password (NB in real life you’d have to do a whole lot more than this to secure it).
openssl genrsa -aes256 -passout pass:ReallyS3cure_NOT -out caTopLevel.key 4096And then create a public key: the certificate that will be made available publicly. It’ll be valid for 1095 days, that is 3 years.
openssl req -x509 -new -noenc -sha512 -days 1095 -key caTopLevel.key -out caTopLevel.crt -subj "/C=GB/ST=Scotland/O=myCA/OU=Cert Auth/CN=myCA Top Level"This will ask for the password so that it can access the public key.
If you look at the detail of the certificate produced you can see that it is defaulted to be a certificate authority.
openssl x509 -in caTopLevel.crt -text -noout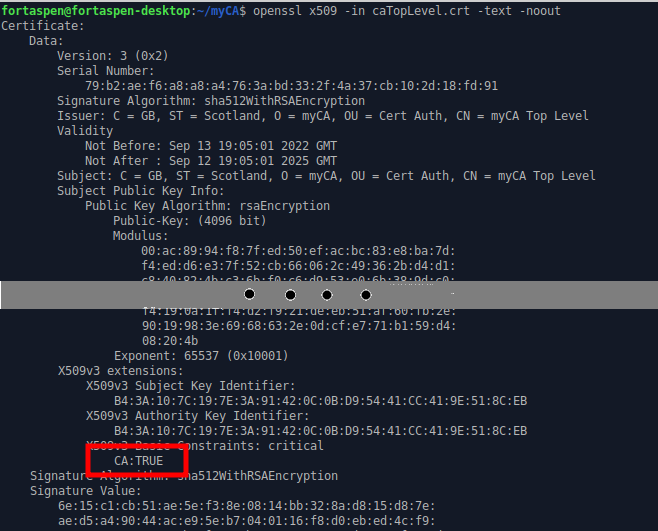
CA Level 2 Certificate
Next we’ll create a second public/private key pair. This time only valid for one year.
openssl genrsa -aes256 -passout pass:AlsoS3cure_NOT -out caLevel2.key 4096

openssl req -x509 -new -noenc -sha512 -days 365 -key caLevel2.key -out caLevel2Unsigned.crt -subj "/C=GB/ST=Scotland/O=myCA/OU=Cert Auth/CN=myCA Level 2"
Now we have to sign the new level 2 public key certificate using the top level keys but here we have a quirk. For certain scenarios a signed certificate is not enough. We need to have well-formed x509 “extensions”. As the name implies these are extra fields that were not in the original X509 specification.
We create an extension file (caLevel2.v3.ext) with the data required for the additional fields. In this case we want to add X509v3 extension to populate “Subject Key Identifier” and “Authority Key Identifier” (hashes for the certificate “subject” and signing “authority”).
authorityKeyIdentifier=keyid,issuer
basicConstraints=CA:TRUE
keyUsage = digitalSignature, keyCertSign
We point to this file when we sign the private key certificate we just created.
openssl x509 -sha512 -days 365 -in caLevel2Unsigned.crt -extfile caLevel2.v3.ext -CA caTopLevel.crt -CAkey caTopLevel.key -CAcreateserial -out caLevel2Signed.crtThe file “caLevel2Signed.crt” has now been signed by the master key so we can now use “caLevel2” to sign lower level certificates and there will be a chain of signatures right up to the master. It is also a “certificate authority” by default.
openssl x509 -in caLevel2Signed.crt -text -noout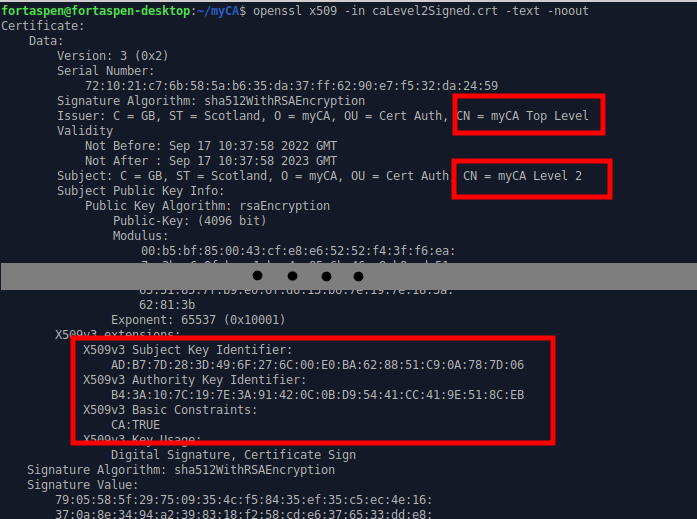
FortAspen Server Certificate Request
We create a private key for the server certificate. Like all private keys this should be kept private and only made available to the software running the web server. We don’t password protect it to avoid having to provide the password every time the server is started after a reboot.
openssl genrsa -out myweb.key 4096To obtain a certificate signed by the CA we prepare a certificate signing request (CSR).
openssl req -sha512 -new -subj "/C=GB/ST=Scotland/O=Fortaspen/OU=Ops/CN=The Web Server" -key myweb.key -out myweb.csrThis produces a PEM formatted CSR file
-----BEGIN CERTIFICATE REQUEST-----
MIIEtzCCAp8CAQAwcjELMAkGA1UEBhMCR0IxETAPBgNVBAgMCFNjb3RsYW5kMRAw
DgYDVQQHDAdHbGFzZ293MRIwEAYDVQQKDAlGb3J0YXNwZW4xDDAKBgNVBAsMA09w
czEcMBoGA1UEAwwTbXl3ZWIuZm9ydGFzcGVuLmNvbTCCAiIwDQYJKoZIhvcNAQEB
...truncated...
ndp9aDIbYOvZfJVErT8NaOTHuuFNKvhdIbZnzjJEs/oF7/pv+l5GCvkHrSdLuWl4
JYVDGWrWB07shrZDazFfL/yf/3CV43Qu8rFwatqH8NsOm/KVubIxPmMqQLlAzCUN
x3/5njfhbNWQQc+yhUQ3v4QJwUJSYZjCwyBO4rgVQJkfnDBptYo14pF7e9sv1yyz
tGmB+eRAhBa4ncE=
-----END CERTIFICATE REQUEST-----
In the olden days, a web server certificate for server “myhost.mydomain.io” would be specified by setting the CN (common name) in the CSR/certificate’s subject to “CN=myhost.mydomain.io”. This no longer works so we set the CN to “The Web Server”. You now have to specify the server name using “subjectAltName” in another extension data file.
We create an extension file (myweb.v3.ext) for the identification of DNS names “myweb.fortaspen.com” and “myweb”.
authorityKeyIdentifier=keyid,issuer
basicConstraints=CA:FALSE
keyUsage = digitalSignature, nonRepudiation, keyEncipherment, dataEncipherment
extendedKeyUsage = serverAuth
subjectAltName = @alt_names

[alt_names]
DNS.1=myweb.fortaspen.com
DNS.2=myweb
FortAspen Server Certificate Signing
The CSR file and the extension file are used by the CA to produce a signed public server certificate. The OpenSSL command would be
openssl x509 -req -sha512 -days 365 -in myweb.csr -extfile myweb.v3.ext -CA caLevel2Signed.crt -CAkey caLevel2.key -CAcreateserial -out myweb.crt
This would produce a signed certificate that looks much like any other.
-----BEGIN CERTIFICATE-----
MIIFUjCCAzoCFBukIa55qf2lGzwBZLhnJ5QN9O5vMA0GCSqGSIb3DQEBDQUAMFkx
CzAJBgNVBAYTAkdCMREwDwYDVQQIDAhTY290bGFuZDEQMA4GA1UEBwwHR2xhc2dv
dzESMBAGA1UECgwJRm9ydGFzcGVuMREwDwYDVQQLDAhDZXJ0QXV0aDAeFw0yMjA5
MTIxNTAwNTFaFw0yMzA5MTIxNTAwNTFaMHIxCzAJBgNVBAYTAkdCMREwDwYDVQQI
...truncated...
ImjkdZAgWUMVne2YlVe0Ww4UJgkg2tFdbj6QCExCDp24Te1rylAWydF1gA7oO2UW
0SzN5U2AtiUNshKYf7lVylOtC9S6ZhX2z4vDWsp6ulm1j/vnDPsuNXsosaPZj8ej
jl6Np4z6phwfruharwCrXprVewpPcMU2qwip3uJDPoJQjqOcUpyMpiiWujW8SMMv
Iq2CB1gozMxwo8gl2CB26cij2oKZ6A==
-----END CERTIFICATE-----
We can query the certificate to check that both the server names have been incorporated.
openssl x509 -in myweb.crt -text -noout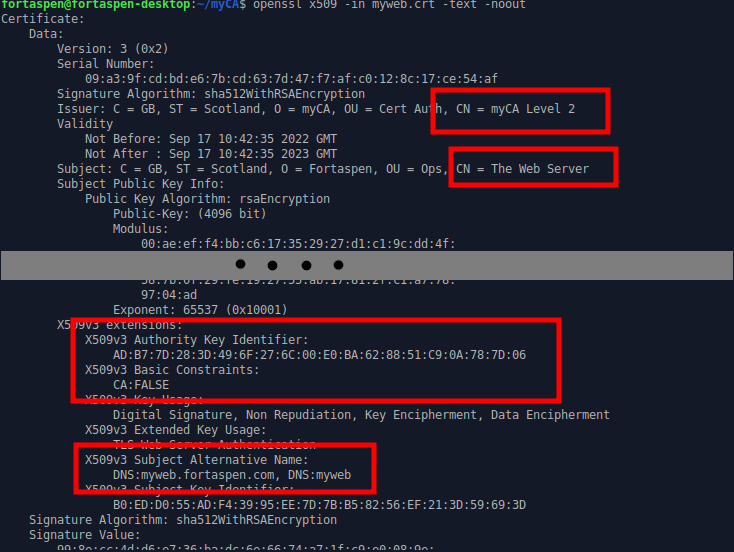
You can see the issuer is the Level 2 certificate authority and check that the v3 extension “Authority Key ID” is the same as the Level 2 certificate “Subject Key ID” from above.
Configure Apache2 Server
By default when an Apache2 HTTP server is installed it does not support HTTPS. We need to configure and enable it.
First we move the necessary certificate files onto the host. We need the following files.
- myweb.key – the private key of the server certificate
- myweb.crt – the public server certificate signed above by the level 2 CA certificate
- caChain.crt – a file with all the CA certificates from the one that signed the server certificate all the way up to the one below the root certificate (i.e. except the root – that’s assumed to be in the HTTP client’s list of trusted certificates). In our case this is basically caLevel2Signed.crt. This will be provided to any calling client so that it (along with the root certificate held locally and the server certificate) can validate the certificate chain.
We put these a directory “/etc/apache2/ssl.cert” and make sure the server key is only available to the user that is running the http server (“chown www-data:www-data myweb.key” & “chmod 400 myweb.key”).
Next we go to the “/etc/apache2/sites-available” directory and edit the default-ssl.conf file. We need the following lines to be active and uncommented (within the “VirtualHosts” element) to activate the “SSL engine” (It should be TLS engine these days but “old habits die hard”) and locate the certificate files.
                SSLEngine on
                SSLCertificateFile      /etc/apache2/ssl.cert/myweb.crt
                SSLCertificateKeyFile /etc/apache2/ssl.cert/myweb.key
                SSLCertificateChainFile /etc/apache2/ssl.cert/caChain.crt
Now we activate TLS within Apache2 and restart the Apache2 service
sudo a2ensite default-ssl
sudo systemctl restart apache2
systemctl status apache2
ss -lt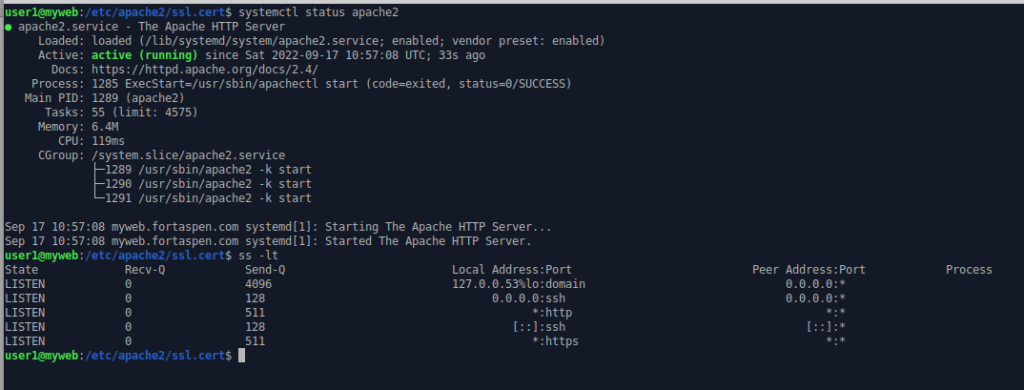
We can see that the https port (443) is now listening for activity.
Web Browser Client
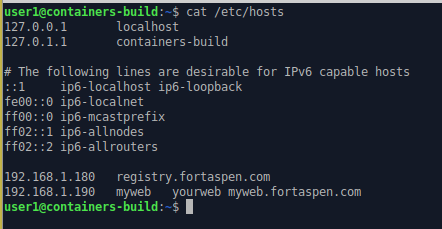
We’ve given the web server a fixed IP address of 192.168.1.190 and updated the “/etc/hosts” file on out client device with a firefox web browser to point the DNS name “myweb.fortaspen.com” to this address. We’ve also pointed the DNS names “myweb” and “yourweb” to the same IP address.
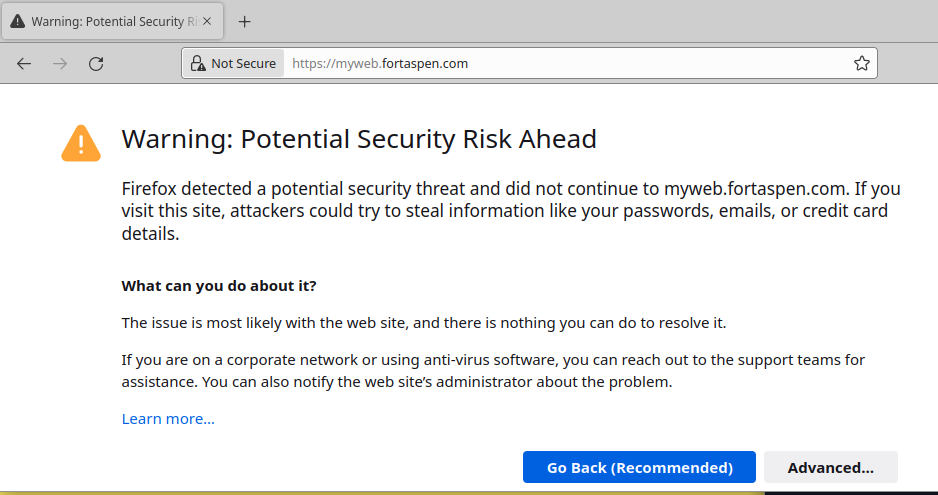
We open the browser and enter “myweb.fortaspen.com” in the address bar. We are shown a security alert. The site is found but the server certificate is not approved by one of the certificate authorities known to the browser.
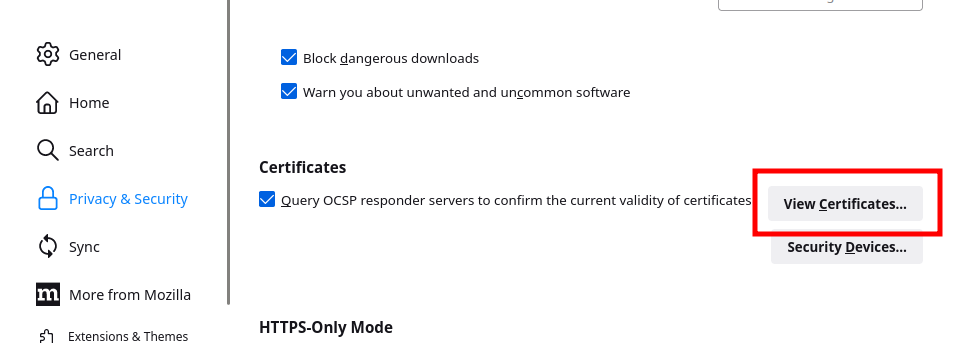
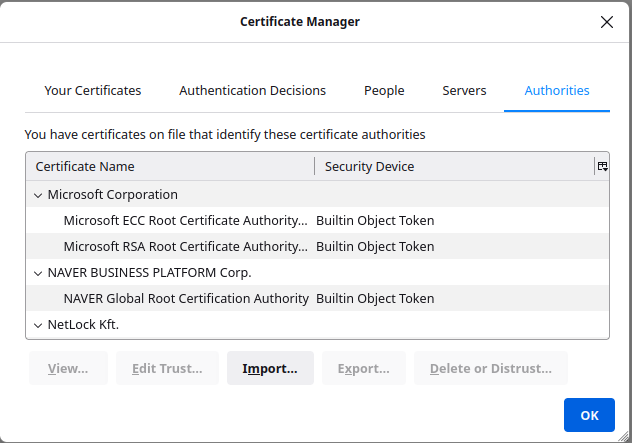
Anyone can play at being a Certificate Authority – like us here – but only major certificate authorities have their top-level certificates distributed along side software like web browsers. The top-level, “root” certificates distributed with the Friefox browser, for example, can be found in the “Privacy and Security” area of the settings page (“about:preferences#privacy” in the address bar).
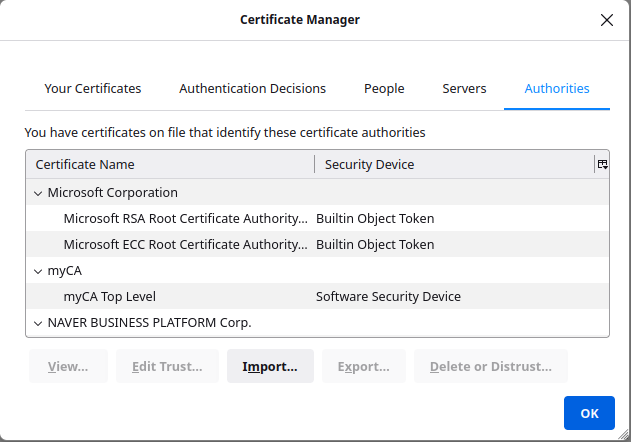
This obviously doesn’t include the top-level certificate we just created so we need to add it using the import function. After clicking import we link to the “caTopLevel.crt” file. Once uploaded it is added to the list of certificate authorities.
We can then refresh the site and the page now loads without a warning.
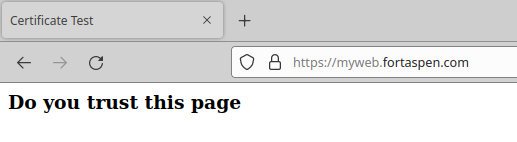
By clicking on the padlock next to the address we can inspect the certificate and its hierarchy.

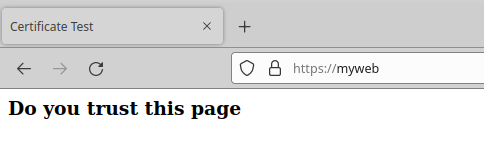
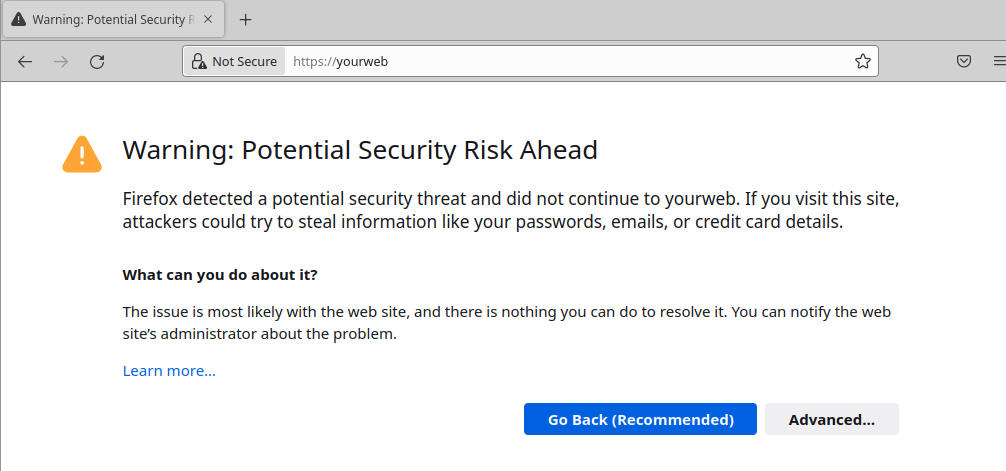
You may recall that the server certificate has two aliases set up: “myweb.fortaspen.com” & “myweb”. The /etc/hosts files has been set up to send both “myweb” and “yourweb” to the same server. If you type “myweb” into the address bar, the web page loads successfully as before.
If you type “yourweb” then its back to the security alert. That alias wasn’t in the signed certificate so it is not approved.
Operating System Certificates
nlike web browsers, some software does not come with its own set of pre-approved certificate authorities and uses the operating system CA store. For example “curl” and “wget”.
If we try to call our web site using curl we get security warning because the newly created certificate authority is not present.

We can add our certificate authority to the operating system store. In Ubuntu 22.04 the package required to manage the certificate authority store is “ca-certificates”. To install
sudo apt-get install -y ca-certificatesYou can then put your top-level certificate authority file “caTopLevel.crt” in the directory
“/usr/local/share/ca-certificates”
and run the script “update-ca-certificates” to add the CA to the operating system pool.
sudo update-ca-certificates
This will have added two symbolic links to caTopLevel.crt into the /etc/ssl/certs directory which is the master trusted certificate store. If we retry the curl request again, this time the web page is returned without complaint.