
If you have a single server and want to run multiple loads in their own separate isolated environments you could
- use virtual machines, with one of the loads running on each VM.
- run each load in its own “container”.
Using containers has a smaller overhead: less of the server’s computing power is lost to keeping the show on the road. With VMs you need a hypervisor running on the server and each VM has its own full operating system including kernel. With containers, a single operating system kernel is shared by all of the loads with the software configured to allow operation without any unit trampling over the resources allocated to the others.
Containers have become synonymous with Docker but there was a older approach which is still available today: LXC/LXD.
Note that Docker offers lighter-weight “application containers” (with a restricted set of services) whilst LXC/LXD offers “system containers” (which look to the running processes like a fully-fledged operating system) so the two are not equivalent.
LXC vs LXD
LXC first coalesced in 2008. It took advantage of the underlying features of the Linux kernel to create separate workspaces:
- chroot jails – restricting the section of the filesystem a process can access
- cgroups – control groups that share out system resources to groups of processes
- namespaces – adding a namespace when calling system resources so that one namespace can’t access the resources of another
LXC can be complex to get working. It offers containers in two modes: privileged and unprivileged. Privileged containers run as root and are not ideal from a security perspective. Unprivileged containers have no access to root and thus have limited scope. Getting them running is not straightforward as you can see here.
LXD is a more recent extension of LXC which is easier to use and has a REST API to allow for remote / programmatic management.
Preparing LXC/LXD
If you’re using a Debian-based Unix distribution, LXC/LXD is installed via snap (instructions for other platforms can be found here).
sudo snap install lxdOnce downloaded and installed, you’ll need to initialise the service
sudo lxd initThis will ask a number of questions about configuration. You can accept the defaults (a detailed description of the options can be found here). The data store for you containers will be managed on your disk by ZFS. A network bridge will be created. This is like having a second network card which can talk to the container.

That’s the last time you’ll use an “lxd” command. From this point the command changes to lxc. ‘lxc’ is used to manage the VMs/containers.
Typically the VM/container that you’ll be running will first be read from a remote repository. You can list the repositories available to you.
lxc remote list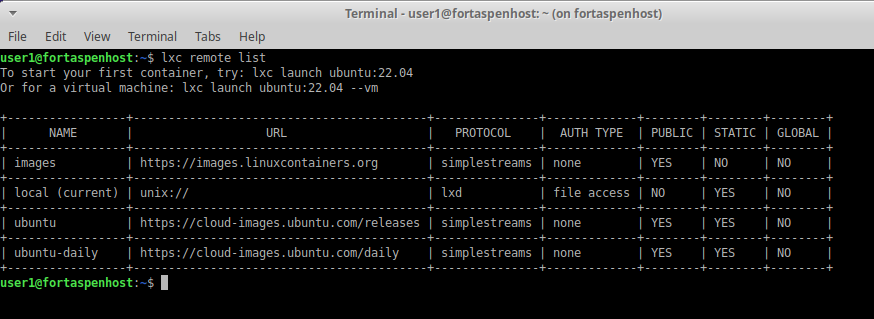
The main repository of images (unsurprisingly known as “images:”) is provided by the Linux containers project behind LCX/LXD. You can see which VMs/containers are available using the command
lxc image list images:This will list a large number of options. You can narrow it down a bit. For Linux Mint distributions that will run on a x86_64 architecture:
lxc image list images: amd64 mint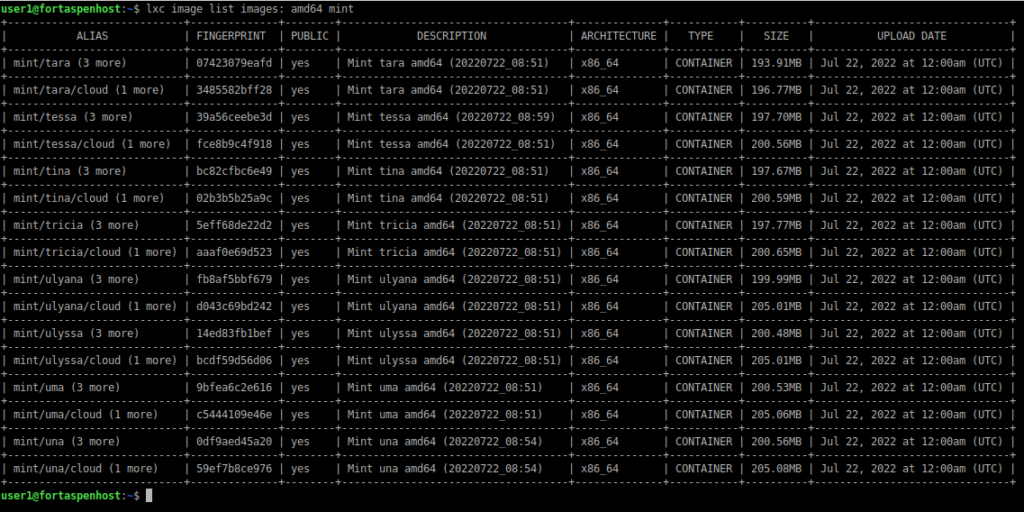
Creating a Container Instance
Lets say you want to run a container that looks like a Ubuntu 22.04 (Jammy Jellyfish) server
lxc image list images: amd64 ubuntu/jammy
To start the container you could choose either of these two commands (24e70d04310e is the fingerprint hash for the required image)
lxc launch images:ubuntu/jammy instance1
lxc launch images:24e70d04310e instance1
This will download the image from the remote repository and place it on the local file system (The actual downloaded file can be found in the lxd snap directory: /var/snap/lxd/common/lxd/images). You can see it listed by checking the local repository. See how the fingerprint matches the start of the filename.
lxc image list local:
This is the snapshot used to create the container instance. It can be used again and again to create more container instances.
Each running container instance is completely separate from the initial image. By default the instance filesystem is held in ZFS. It is not directly visible from the Linux command line.
You can see the ZFS mounts and the “default” filesystem using the commands (you may need to install zfsutils-linux package) including the container “instance1”.
sudo zfs list -t all
sudo ls -l /var/snap/lxd/common/lxd/disks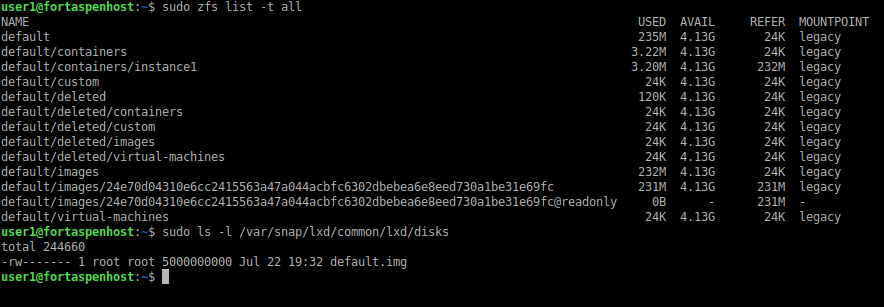
You can see the container is running
lxc list
lxc info instance1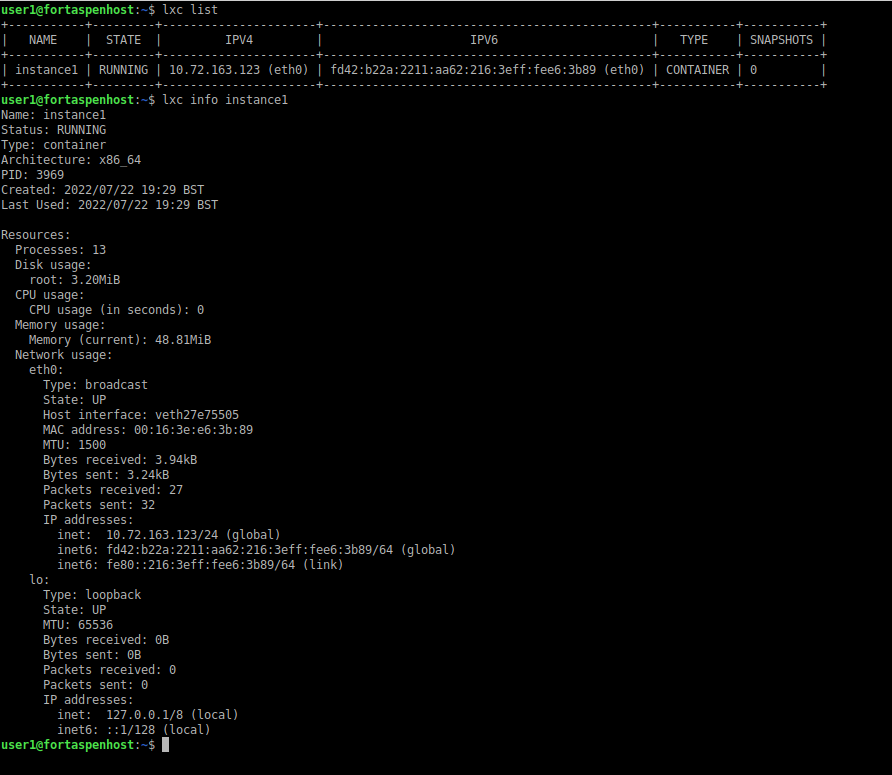
You can run commands inside the container from the lcx command on the host. If you choose the command to be an interactive shell (e.g. /bin/bash) you can have access to a command line inside the container.
Here we install the Apache2 web server (“apt-get install apache2” not shown) and set the default page to “Message from inside the container instance1”.
lxc exec instance1 -- /bin/bash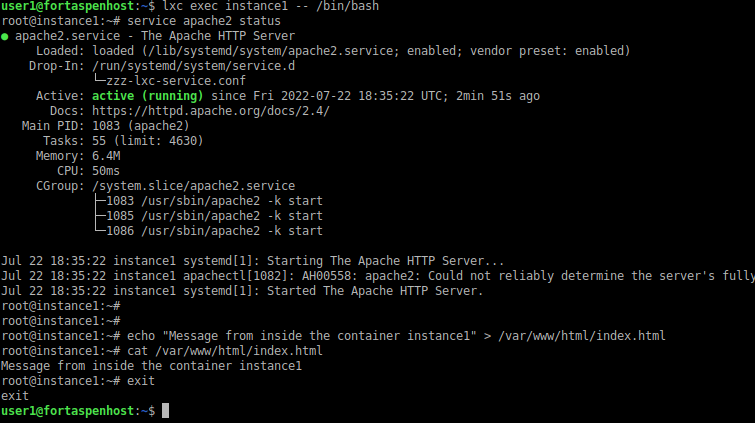
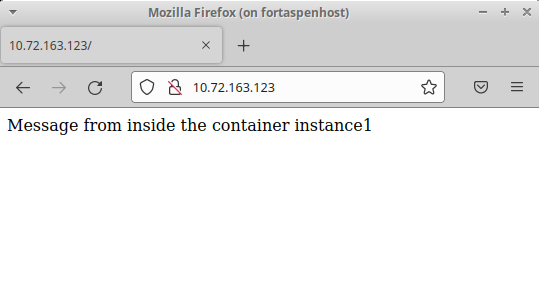
When we return to the host, we can check out the web page at the IP address of the container (which can be found from the ‘lxc list’ above).
You can shutdown the container using the stop command. The filesystem remains in place so you can start it up again using the start command.
lxc stop instance1
lxc start instance1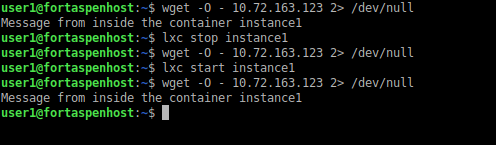
Between the stop and the start, the web page is no longer obtainable because the container and thus the Apache web server has been halted.
It is only when you issue the delete command that the filesystem is removed and the container instance is destroyed.
lxc stop instance1
lxc delete instance1
lxc list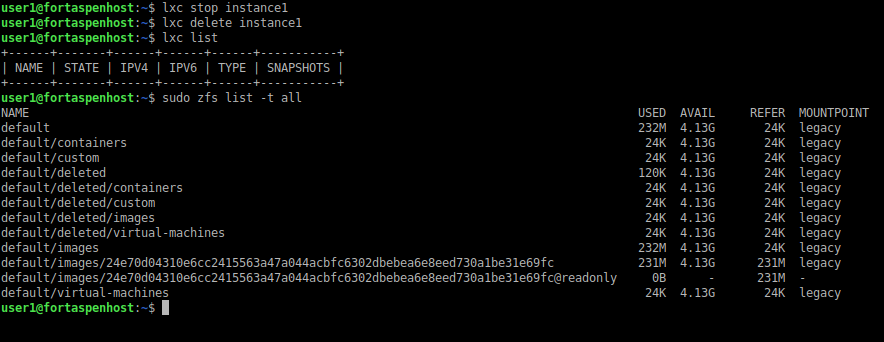
The instance1 data has been deleted from the ZFS data store.
The initial image remains available for you to create another container instance but it would not have the Apache web server installed and you’d be back to square one.
The process of preparing a custom image for use with LCX/LXD can be found here.