
The simplest way to have a play with Kubernetes on your own machine is to use minikube, a utility that sets up and runs a Kubernetes environment in virtual machines or containers. Working with minikube is not the same as working directly with Kubernetes. The command you issue go via minikube to the VMs/Containers and you can’t see the operation of the cluster in its native habitat but it is a good first step in becoming familiar with Kubernetes.
The time will probably come when you want to get hands-on with the base Kubernetes software. This guide goes through the process of setting up a three node cluster of Kubernetes on virtual machines on a host running Ubuntu Linux 22.04.
Prerequisites
We’re using VirtualBox as the VM manager.
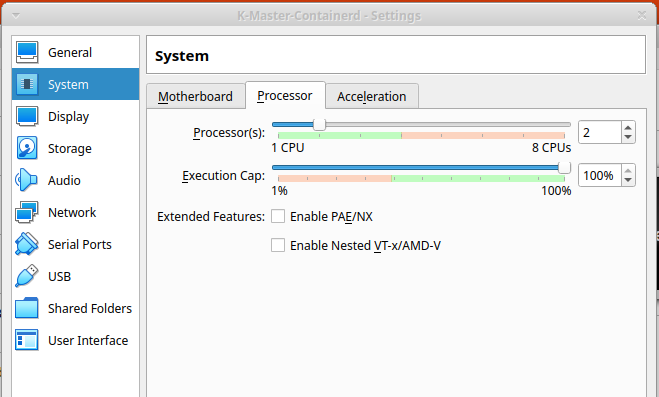
You’ll probably need an 8 core processor host machine. The Kubernets cluster control-plane (aka master node) needs access to two “processors”. The two worker nodes need access to only one “processor” each. If you are also going to end up running a container registry and do anything on the host itself, four cores will be a bit tight.
Installation Process
We’re going to need three virtual machines. All three will need software installed for (a) Kubernetes and (b) a container manager (e.g. Docker) and be set up in a Kubernetes friendly way. First we’ll create a single “base image” VM that has all the software installed. Then we’ll clone this base image three times to create our three nodes. We’ll first get the master node working then turn our attention to the worker nodes.
So the steps we will be following are
• Prep base image & clone 3 times
• Configure Master Node
• Join Worker Nodes
Prepare Base Image
Create Base Image
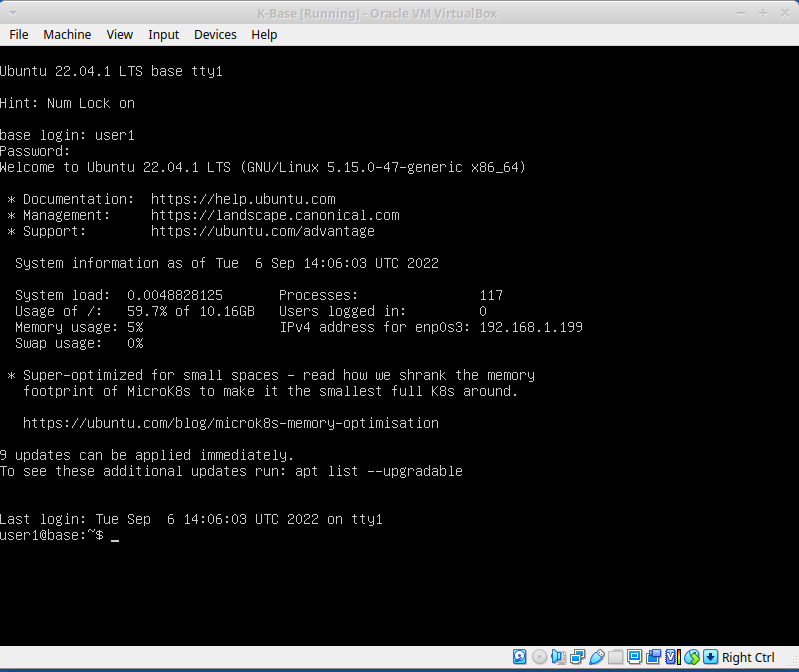
You can see how to install VirtualBox and create a virtual machine here. We’ve used the Ubuntu Server 22.04 ISO image (e.g. “ubuntu-22.04-live-server-amd64.iso”) here rather than Ubuntu Desktop.
We’ve created a virtual machine with hostname “base” and performed a “normal start” (i.e. with console).
Deactivate swap
Kubernetes won’t work with ‘swap’ (using disk as an extension of memory) active. It needs to be deactivated.
You can deactivate it until next reboot using the command
sudo swapoff -abut you would need to repeat this every time the machine started. To permanently disable swap you need remove/comment out the swap filesystem from the “/etc/fstab” file using your chosen editor. It should end up looking something like this:

Linux Kernel Modules
The Linux kernel utilises a number of modules (i.e. plug-ins) to do its job. You can list the currently active modules using the ‘lsmod’ command. Kubernetes needs the following two modules to be active:
- overlay
- br_netfilter
You can use a command like ‘lsmod | grep overlay’ (and br_netfilter) to check if they are already active. If nothing is returned then that module needs to be activated.
You would need to create a file, such as ‘k8s.conf’, in the ‘/etc/modules-load.d’ directory using an editor that includes just the names of the modules you need to be started. The following command performs the same task.
cat <<EOF | sudo tee /etc/modules-load.d/k8s.conf
overlay
br_netfilter
EOF
That file will be read at the next system start. If you needed to start the modules immediately (not necessary because we’ll be cloning this VM before its needed) you could use
sudo modprobe overlay
sudo modprobe br_netfilter
Update Kernel Networking Config
We need to set a few configuration parameters so that the Linux kernel correctly deals with bridged traffic.
We need a file, such as “k8s.conf” to be placed in the “/etc/sysctl.d” directly which is read in at system start. The file should contain the lines:
net.bridge.bridge-nf-call-iptables = 1
net.bridge.bridge-nf-call-ip6tables = 1
net.ipv4.ip_forward = 1
you can create the file with an editor or the following command.
cat <<EOF | sudo tee /etc/sysctl.d/k8s.conf
net.bridge.bridge-nf-call-iptables  = 1
net.bridge.bridge-nf-call-ip6tables = 1
net.ipv4.ip_forward                 = 1
EOF
Install Kubernetes Software
Kubernetes is not available in the standard Debian/Ubuntu repositories. You have to configure a link to the ‘kubernetes.io’ repositories and download from there. See this.
There are three packages to be installed
- kubeadm – installation and admin tool
- kubelet – main Kubernetes linux service/daemon
- kubectl – command line tool for controlling a Kubenetes cluster
You need to issue the following commands in order.
# make sure you have the necessary tools
sudo apt-get install -y apt-transport-https ca-certificates curl
# download the keyring for validating the downloads
sudo curl -fsSLo /usr/share/keyrings/kubernetes-archive-keyring.gpg https://packages.cloud.google.com/apt/doc/apt-key.gpg
# add the kubernetes.io repository to the local server’s list and trust the keyring
echo "deb [signed-by=/usr/share/keyrings/kubernetes-archive-keyring.gpg] https://apt.kubernetes.io/ kubernetes-xenial main" | sudo tee /etc/apt/sources.list.d/kubernetes.list
# refresh local respository list
sudo apt-get update
# install kubelet kubeadm kubectl
sudo apt-get install -y kubelet kubeadm kubectl
# prevent automatic updates (which may upset versioning)
sudo apt-mark hold kubelet kubeadm kubectl
Install Docker & CRI-Docker Software
Kubernetes no longer directly supports the Docker container manager (since Kubernetes version 1.24). Some time ago Kubernetes defined the container runtime interface (CRI) that it would use to integrate with container runtimes. Docker does not directly support the Kubernetes CRI and in mid-2022 Kubernetes ceased to support Docker.
Mirantis, the company that sells and supports the enterprise version of Docker, has developed a service process that acts as an interface between Kubernetes and Docker known as CRI-Docker that is CRI compliant. To use this you first you install Docker and then install CRI-Docker.
Installing Docker on Ubuntu 22.04
# 1) Download the 'keyring' for docker
curl -fsSL https://download.docker.com/linux/ubuntu/gpg | sudo gpg --dearmor -o /usr/share/keyrings/docker-archive-keyring.gpg

# 2) Add the Docker repository
echo "deb [signed-by=/usr/share/keyrings/docker-archive-keyring.gpg] https://download.docker.com/linux/ubuntu jammy stable" | sudo tee /etc/apt/sources.list.d/docker.list

# 3) Refresh the repository cache
sudo apt-get update

# 4) Download and install the Docker software
sudo apt-get install -y docker-ce docker-ce-cli containerd.io docker-compose-plugin
The Docker service is immediately active.
systemctl status docker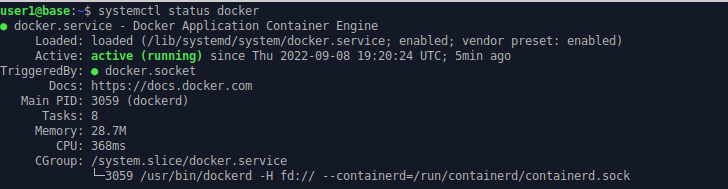
(Immediately after installation, users are unable to interact with the Docker CLI. Each user that is to use the DockerCLI needs to be added to the “docker” user group – “sudo usermod -a -G docker myUserName”. This is not necessary if it is going to be used solely in concert with Kubernetes.)
Installing CRI-Docker on Ubuntu 22.04
There are two ways to install CRI-Docker. One way is to download the binary and set up the Linux service manually as described here. The alternative is to download the raw .deb package containing the CRI-Docker service from github
https://github.com/Mirantis/cri-dockerd/releases
We’re using the .deb file “cri-dockerd_0.2.5.3-0.ubuntu-jammy_amd64.deb“.
(Note that neither method offers hashes to confirm the integrity of downloads so this may not be appropriate for use on a valuable server.)
wget https://github.com/Mirantis/cri-dockerd/releases/download/v0.2.5/cri-dockerd_0.2.5.3-0.ubuntu-jammy_amd64.deb

sudo dpkg -i cri-dockerd_0.2.5.3-0.ubuntu-jammy_amd64.deb

systemctl status cri-docker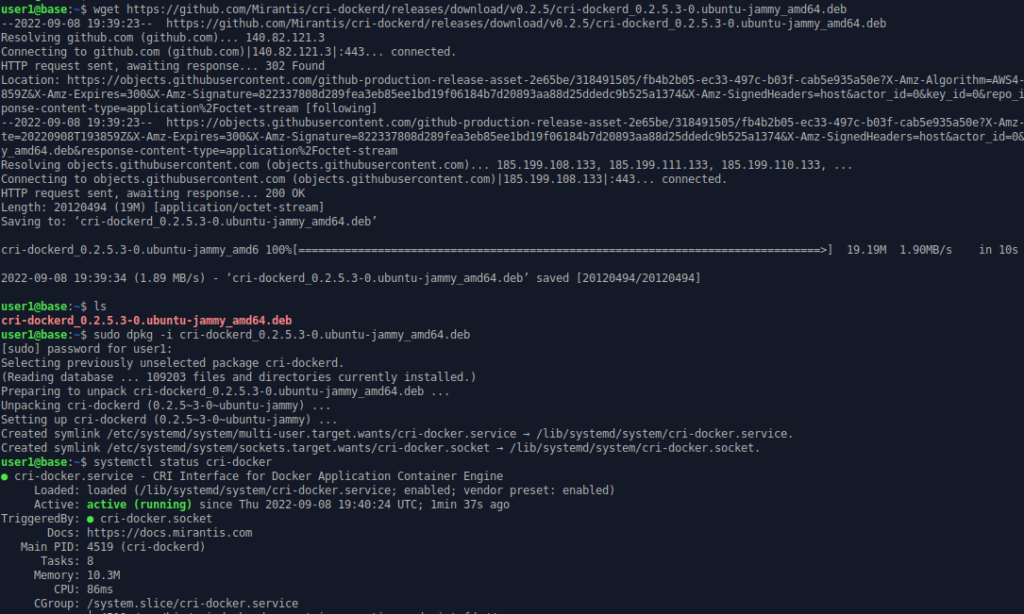
Clone VMs
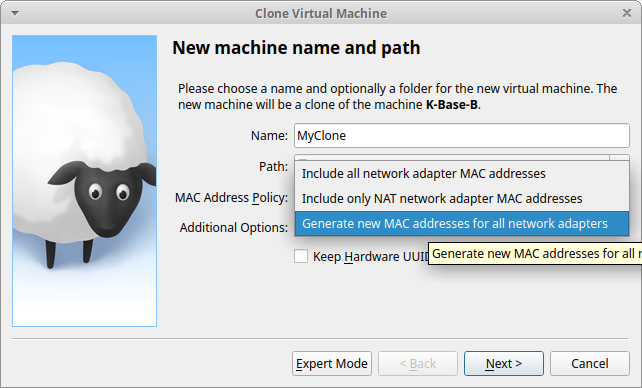
The VM we have prepared should be stopped and cloned three times. The three Kubernetes nodes we hope to activate all need the same kernel modules / config and Kubernetes and container manager software installed.
Kubernetes needs all nodes to have different MAC addresses (low level network ID) so each time you clone the base image, make sure a new MAC address is generated.
Make sure the master node has two processors allocated. The Kubernetes install will fail if this is not set.
Master Node preparation
Our Kubernetes cluster will have three nodes. The hostnames we allocate are: kube-master, kube-node1 and kube-node2. Network traffic must be routable so we’ll give each node a fixed IP address (in our network 192.168.1.200, 192.168.1.201 & 192.168.1.202) and put a mapping from hostname to IP in each host’s “/etc/hosts” file for demo purposes.
Network Set Up
After we’ve started the cloned VM we intend to be our master node, we set the hostname.
sudo hostnamectl set-hostname kube-masterTo fix the IP address we look in the “/etc/netplan” directory for the network configuration file and edit it to look like
network:
ethernets:
enp0s3:
dhcp4: false
addresses:
– 192.168.1.200/24
gateway4: 192.168.1.1
nameservers:
addresses: [192.168.1.1]
version: 2
The gateway4 address is the IP address of the router that links to the wider network, in this case a domestic router with IP address 192.168.1.1. The nameserver addresses is your local (or remote) DNS servers. Here the domestic router also acts as the local DNS server.
We want the nodes to be able to look up each other’s IP address using their hostnames so we put the following lines at the end of the “/etc/hosts” file.
192.168.1.200 kube-master
192.168.1.201 kube-node1
192.168.1.202 kube.node2
In a production environment the look up from hostname to IP address would be managed within DNS (‘A’ / ‘AAAA’ for ip v4 / v6). Using the “/etc/hosts” file simplifies set up for demo purposes.
Kubeadm init
The VM should be restarted to ensure the hostname & static IP have been applied.
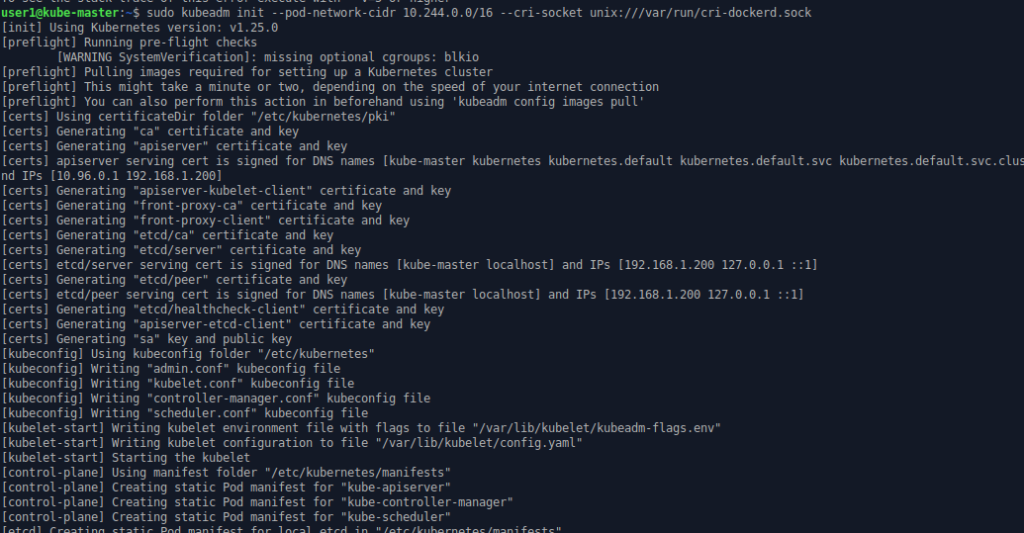
Start the Kubernetes installation with the command
sudo kubeadm init --pod-network-cidr 10.244.0.0/16 --cri-socket unix:///var/run/cri-dockerd.sockkubeadm is the command line utility to manage the installation of the Kubernetes cluster infrastructure. (The internal operation of the cluster is managed using “kubectl”.) The Pod network CIDR needs to be specified with this value because it is a requirement of the Flannel pod network we will apply in the next step.
Because Docker uses the “containerd” high-level container runtime internally, kubeadm doesn’t know if it should attempt to use CRI-Docker or containerd as its target CRI (container runtime interface) runtime. You need to specify the Unix socket related to CRI-Docker so that it knows to use CRI-Docker.
(If you attempted to use containerd at this point it probably won’t be successful. The containerd.io package installed above doesn’t have the kubernetes CRI plugin active. If you run “ctr plugins list” there is no entry for “CRI”. This plugin is active in the Ubuntu standard “containerd” package).
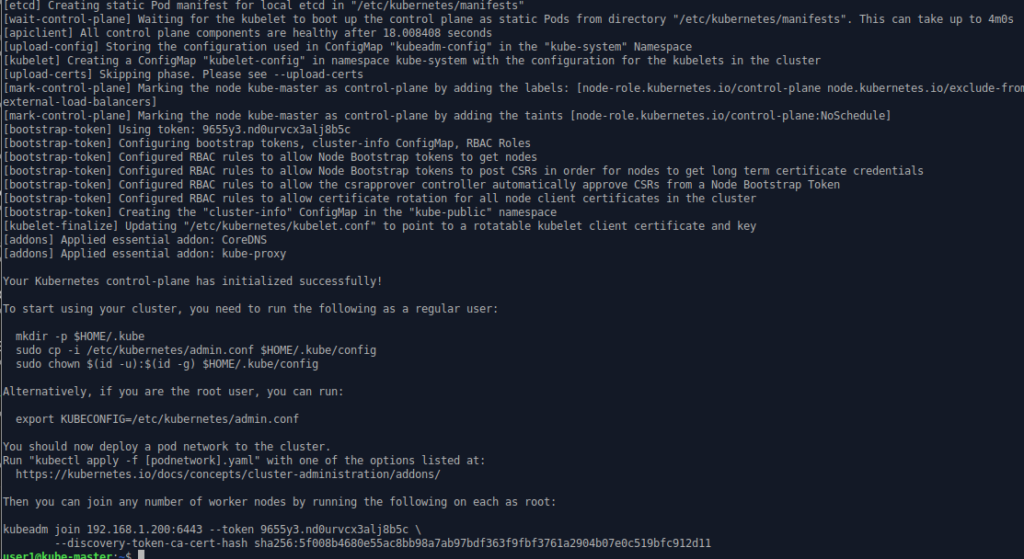
The key text is at the end.
Your Kubernetes control-plane has initialized successfully!
To start using your cluster, you need to run the following as a regular user:
mkdir -p $HOME/.kube
sudo cp -i /etc/kubernetes/admin.conf $HOME/.kube/config
sudo chown $(id -u):$(id -g) $HOME/.kube/configAlternatively, if you are the root user, you can run:
export KUBECONFIG=/etc/kubernetes/admin.conf
You should now deploy a pod network to the cluster.
Run “kubectl apply -f [podnetwork].yaml” with one of the options listed at:
https://kubernetes.io/docs/concepts/cluster-administration/addons/Then you can join any number of worker nodes by running the following on each as root:
kubeadm join 192.168.1.200:6443 –token 9655y3.nd0urvcx3alj8b5c \
–discovery-token-ca-cert-hash sha256:5f008b4680e55ac8bb98a7ab97bdf363f9fbf3761a2904b07e0c519bfc912d11
As the text indicates we should set up the ~/.kube/config file so that kubectl can set up a link to the API server. This needs to be done for each user that’s going to use kubectl.
mkdir -p $HOME/.kube
sudo cp -i /etc/kubernetes/admin.conf $HOME/.kube/config
sudo chown $(id -u):$(id -g) $HOME/.kube/configWithout doing this you’ll see the following message when running kubectl commands
“The connection to the server localhost:8080 was refused – did you specify the right host or port?”
The Kubernetes system is now starting to operate but it is not going well.
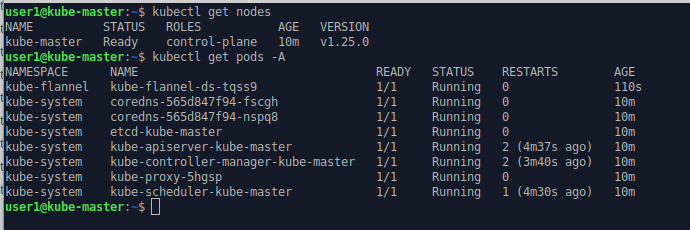
kubectl get nodes
kubectl get pods -A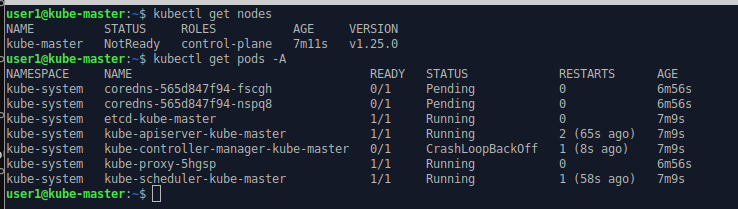
The kube-master node is “NotReady” and DNS pods are “pending” and not “running”. This is to be expected. There is no active pod network yet. That’s the next step.
Apply Flannel Pod Network
There are a number of options available for the pod network. As describe in the kubeadm output you can find a list of pod options at
https://kubernetes.io/docs/concepts/cluster-administration/addons/
We’ve chosen Flannel for its simplicity.
To activate flannel on our Kubernets cluster execute the command.
kubectl apply -f https://raw.githubusercontent.com/flannel-io/flannel/master/Documentation/kube-flannel.yml
This sets up a system pod on the control plane to run flannel.
Note that Flannel only uses pod network CIDR 10.244.0.0/16. You have to specify “–pod-network-cidr 10.244.0.0/16” when running kubeadm above to ensure it is set correctly.
After a few moments the Kubernetes cluster stabilises and the node enters a status of “ready”.
That’s the master node/control-plane operational. Now on to node1 & node2.
Worker Nodes
The same three network set-up steps that were performed on kube-master (described above) need to be performed on both kube-node1 & kube-node2. For example on kube-node1:
• set the hostname (“sudo hostnamectl set-hostname kube-node1”)
• set a static IP address to 192.168.1.201
• add the 3 lines of hostname/ip look-ups to “/etc/hosts”
Once the server is restarted and the hostname/ip changes are in effect, the command to join the Kubernetes cluster can be executed. This command was shown at the end of the “kubeadm init” process on the kube-master (see above).
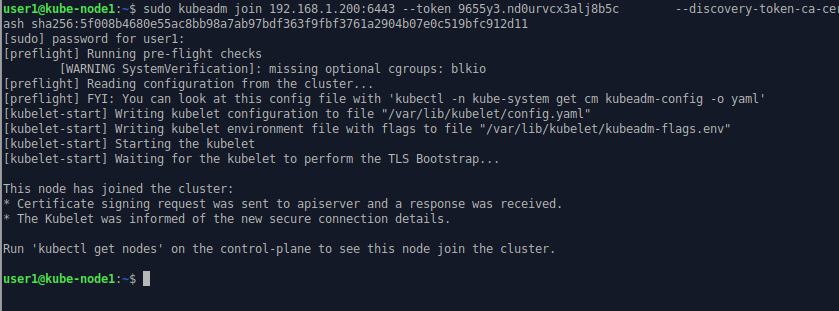
On kube-node1 we can enter
sudo kubeadm join 192.168.1.200:6443 --token 9655y3.nd0urvcx3alj8b5c \
	--discovery-token-ca-cert-hash sha256:5f008b4680e55ac8bb98a7ab97bdf363f9fbf3761a2904b07e0c519bfc912d11
(The token is only valid for 24 hours. You can find out how to generate a new one using “kubeadm” here.)
kube-node1 joins the cluster.
If you do the same thing on kube-node2, it also joins the cluster.
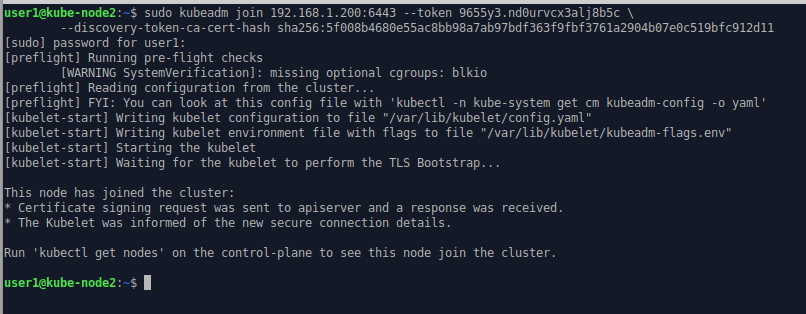
The new worker nodes have been registered on the control-plane / master node.

All three nodes are “ready” and each node has
• A “kubelet” running as a Linux service (not visible here)
• An instance of containerd running as the container manager (not visible here)
• A Kubernetes managed system pods running the Pod network: in this case Flannel
• A Kubernetes managed system pods running kube-proxy
The master node / control plane also has the main Kubernetes processes (discussed here). It is possible to configure a cluster to have multiple nodes running as the control plane to permit redundancy / fault tolerance. You set this up by passing a “control-plane-endpoint” at the “kubeadm init” stage. The endpoint is a load-balanced DNS name that points to the control plane nodes. For example the kubeadm init would be:
kubeadm init --pod-network-cidr 10.244.0.0/16 --control-plane-endpoint=kube-master.fortaspen.comIf you want to see Kubenetes go through its paces, check out our simple case study.