
As with other container approaches, you use Docker to run several, separated loads on a single host computer.
Containerisation (and thus Docker) makes your life simpler if you are going to need to run software in many locations. Its very handy in large projects where you only have to prepare a container image with your developments once and it can be run in different environments (developer’s PC, functional testing, technical testing, UAT etc) with little effort.
It has be said it does take a bit of effort to prepare the container image and you do need a container engine installed whereever you want it to run. Lets have a look at (a) running a shell script in a container and (b) getting a web server running in a Docker container in Ubuntu Linux.
Install Docker
You can find the instructions to install docker on different platforms here:
https://docs.docker.com/engine/install/
We installed the docker community edition on an Ubuntu host (instructions here).
Docker Images
In order to create a container that does something useful, you first need an “image”. Images work with the container runtime to create an operating system-like environment for your software. The container runtime (basically a facade for the host’s operating system kernel) cannot on its own support your software and the files and configuration in the image need the co-ordination offered by the container runtime.
Container runtime + image = environment for software
There are a large number of images available on the Docker Hub, the Docker-hosted central repository, and you can search for them with the ‘docker search’ command. Lets look for public Ubuntu Linux images available.
docker search ubuntu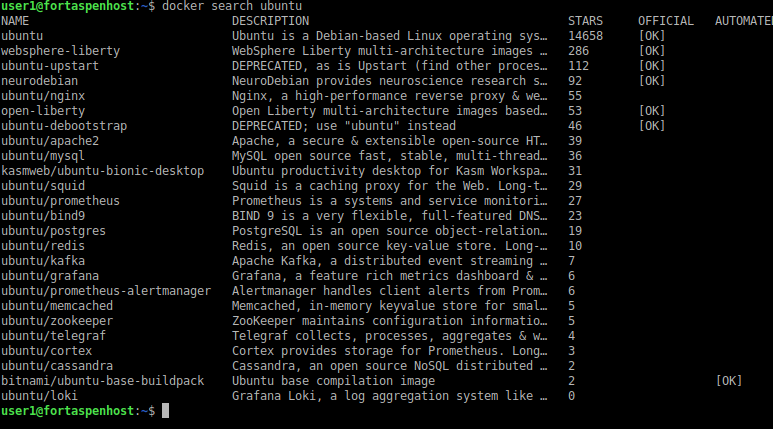
We can copy the main Ubuntu image onto our local system.
docker pull ubuntu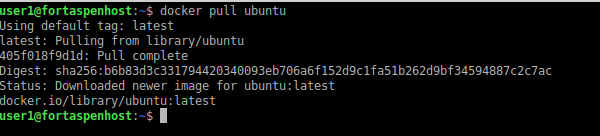
Note that to use an image it has to be on your machine, either explicitly pulled like this or automatically pulled as part of another action.
Now we can list the images on the local machine.
docker image list
This is the ubuntu:latest image where “latest” is a “tag” on the image. Where no tag is specified, ‘latest’ is applied by default but the tag can be used for a specific version of the image or underlying software.
Containers
A container is an instance of an image running in the container runtime. We can kick off an instance of the Ubuntu image using the command.
docker run ubuntu:latest
docker container list –all
This creates a container and, because it contains no main command, it exits immediately. (note the “–all” will be necessary to see the container. Inactive containers are ignored by the basic “list”).
Let try again but this time run an interactive shell inside the container. By running /bin/bash we give the container something to do. Note the -it options redirect standard input and output of the container to the host session so we can interact with it.
docker run -it ubuntu:latest /bin/bashWe can then issue the following commands within the container.
@inContainer/# ps -ef
@inContainer/# ls
@inContainer/# ip addr
@inContainer/# ss -lt
@inContainer/# exit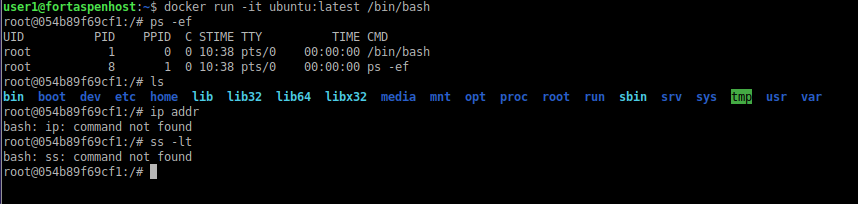
Only two processes are listed (the shell and the ‘process list’ itself). This compares with around 100 process that are listed on the host (also a Ubuntu system) by the same command. Note that the interactive networking commands (ip & ss) are not available. They are not in the Docker “base” image as they are not seen as being useful in containers – you could install/add them yourself if you needed them. Docker base images are very much a cut down version of the operating system (this contrasts with LXC/LXD containers).
The Docker base images of operating systems are not very useful on their own. Their utility comes from the fact they are the foundation on which user images are prepared.
User Built Images
User built images take one of the base operating-system-like images and add application code. Lets try a simple example: showing the time inside a container.
First we need a simple Unix shell script called ‘time.sh’ that echoes the current time.
#!/bin/bash
echo "The time inside the container is" `date`;
and place this in a directory ~/dockerApp1 (where ~ is the user’s home directory) on the host. As with all shell scripts we have to make sure it executable (chmod 777 time.sh).
Next we need a ‘dockerfile’. Dockerfiles are the key to using docker. They are the script used to take the base image we looked at above and prepare a user-specified container to do useful things. Lets look at the dockerfile for preparing our user container.
FROM ubuntu:latest
ADD time.sh /usr/local/bin/time.sh
CMD ["/usr/local/bin/time.sh"]
All dockerfiles start with FROM. This is the base image that they start with. Next we add our script time.sh and place it in the usr/local/bin directory of the image. Finally the CMD is the directive for the main work of the container. This is where we run our script.
The dockerfile (with name “dockerfile”) is put in the build directory above and then we can build our user image.
docker build -t user_image ~/dockerApp1
docker image list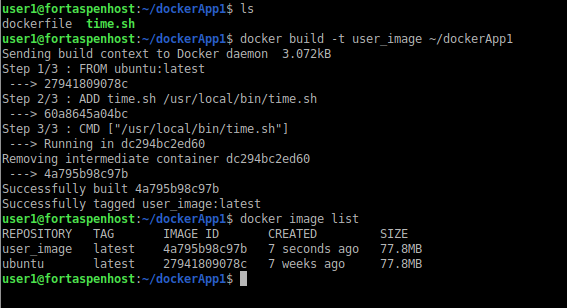
And now we can run our container.
docker run user_image
The user_image contains everything necessary to run the application. The only other thing it needs is a container runtime. To let other people run your application all you need to do is upload it to a image repository (perhaps Docker Hub, a container repository of a cloud provider or some other suitable repository) or you could export it to a tar file (using the ‘docker export’ command) and move the file manually to the target environment.
A Web Server in a Container
The main practical use of containers in the cloud is to host long running “service” processes. Lets try setting up an Apache2 web server running on top of Ubuntu in a Docker container.
We’ve created an build directory, ~/dockerApp2, and created a simple index.html page file to be shown by the web server (for simplicity we’ve not bothered with html).
Message from within the Docker ContainerNow in the same directory, create the dockerfile.
FROM ubuntu:latest

RUN apt-get update && apt-get install -y –no-install-recommends apache2

ADD index.html /var/www/html/index.html

VOLUME ["/var/log/apache2"]

EXPOSE 80

CMD ["apachectl", "-k", "start", "-DFOREGROUND"]
The FROM directive starts with the same base Ubuntu image as above. The RUN command installs the apache2 web server from the standard repositories. The index.html file is installed at the root of the apache2 page hierarchy (index.html being the default page name for web pages). We declare a filesystem volume “/var/log/apache2” and allow (expose) TCP networking port 80 from inside the container to be linked to the outside world. Finally the CMD runs the Apache web processes in foreground.
You can read more about the options in the dockerfile here.
We build the image.
docker build -t web_srv_image ~/dockerApp2
docker image list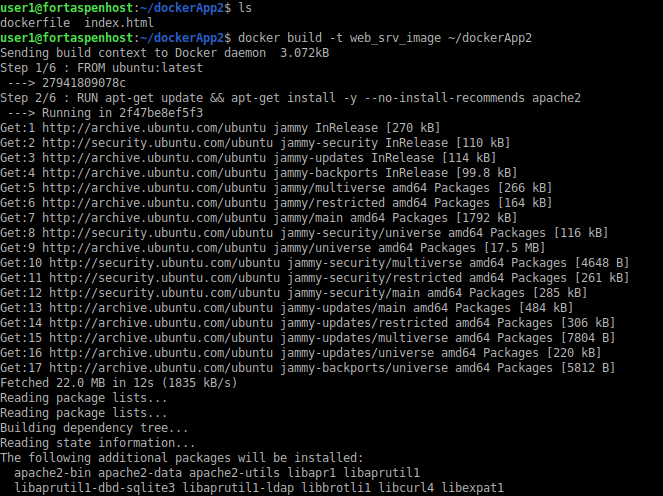
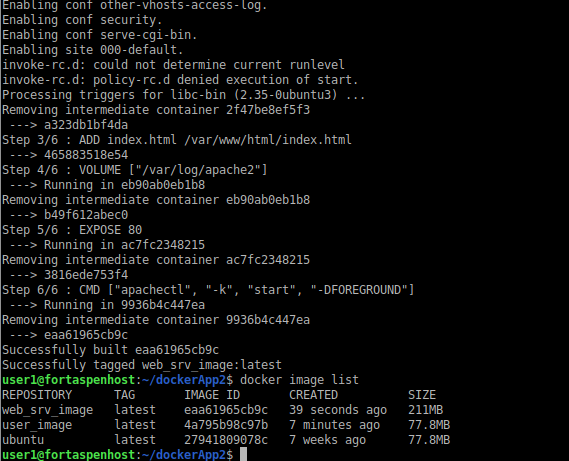
Note that the image size for the basic Ubuntu image is 78MB and the web server is 211MB. The install of Apache2 adds an additional 130+MB. Depending on what you are looking for you can use a smaller, more ‘bare-bones’, Linux image. The base image for the Alpine Linux distribution for example is around 6MB. You can see the Alpine Linux Docker base image being used for a web server here.
This time when we start the container we have to map the filesystem volume (-v) in the container to the host filesystem (so we can see the logfile from the host) and map the TCP port number inside the container to a TCP port on the host (-p). The -d option (detached) is used to indicate that the container should run in background. Without the -d option, the “docker run” command would appear to hang.
docker run -d -p 90:80 -v /home/user1/weblog:/var/log/apache2 web_srv_image
docker container ls
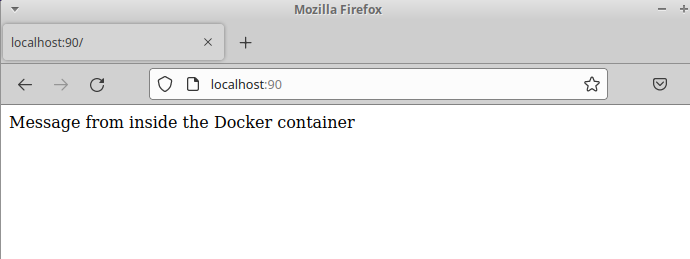
Because port 80 in the container has been mapped to port 90 on the host we can view the container’s web page using a browser from the host on port 90.
We can also check out the mapped file directories. Remember “/var/log/apache2” was made available in the dockerfile above and we mapped it to /home/user1/weblog when we started the container.
ls ~/weblog
tail access.log
This lets the host monitor log file activity in the containers.
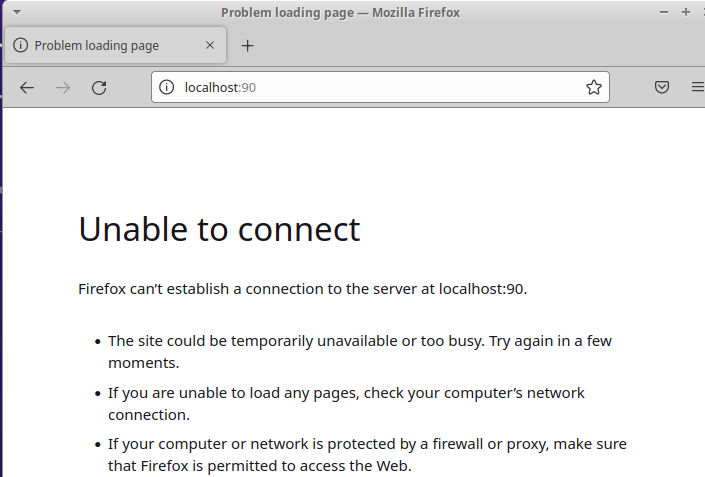
We can stop the container.
docker container stop <containerID>
docker container ls
and the web page is no longer available.
The container’s file system is however still able should you wish to restart it. When the time comes you can remove the container files from the host’s filesystem using the remove command.
docker container remove <containerID>Though it is probably advisable to start up the container using the “docker run –rm” option which automatically removes the container when it is stopped.
Summary
That was a quick introduction to Docker. You use Docker to run several, separated loads on a single host computer. You take a base “image” from a central repository, customise it using a dockerfile and then get Docker to build a new image to your requirements. You can them run that image inside a container on the local computer or move it to other computers and then run it with a single command.
To reduce the image size being transferred and loaded into memory, many Docker images use the small Alpine Linux distribution. You can read more about the generation of Alpine Linux Docker images here.